Monday, December 5, 2011
Tuesday, November 22, 2011
Wednesday, June 15, 2011
Tuesday, May 24, 2011
Max Script - Grid
I use this to cut up an object
http://www.scriptspot.com/3ds-max/scripts/frodos-magic-scripts-pack-v2
http://www.scriptspot.com/3ds-max/scripts/frodos-magic-scripts-pack-v2
Monday, May 16, 2011
Found a really good After effects Script
http://www.videocopilot.net/tutorials/trim_compose_script/
Allows you to edit in Premiere
cut and paste into After Effects and then trim all the footage
Allows you to edit in Premiere
cut and paste into After Effects and then trim all the footage
Honeymoon - 3 weeks
I have been away on my honeymoon for 3 weeks for haven't touched a PC for the time I have been away
Been to Sri Lanka/Maldives/Dubia


Been to Sri Lanka/Maldives/Dubia

Elephant Orphange

Meeru Island - Maldives

Burj Khalifa - Dubia
Sunday, April 17, 2011
Project MAYA - Puppet Head
After reading the brief and doing some reaseacrh into different puppet types. I decided the model a head of a Easter Island Statue.
v1 - I imported reference images onto plane and created a primivate half a head.

I had created a version in the class but for some reason the normals on the faces had got mixed up and when looking at the model it didn't look correct.
I started from fresh at home and developed my head.
v2 - You can see the original version of the head where I was having problems

v3 - I have mirrored the other half of the head

v4 - More Complex Head with reference Pictures


v6 - for some reason I skipped a verison
v7 - I included some headphones to give the statue some personality
 Final Render
I added the Physical Sun and Sky

v1 - I imported reference images onto plane and created a primivate half a head.

I had created a version in the class but for some reason the normals on the faces had got mixed up and when looking at the model it didn't look correct.
I started from fresh at home and developed my head.
v2 - You can see the original version of the head where I was having problems

v3 - I have mirrored the other half of the head

v4 - More Complex Head with reference Pictures

v5 - Head Complete - Using Smoothing

v6 - for some reason I skipped a verison
v7 - I included some headphones to give the statue some personality

I added the Physical Sun and Sky

Useful Websites
http://www.spherevfx.com/downloads/MayaHotKeys.pdf
Scan Project
After experimenting with different cameras I decide to use the 50fps capability at 1280x720 on my Canon 550D.
I shot a simple 6 second clip of the my cat (Mowgli) who managed to sit still for about 5 seconds before running out of shot. The video file of this shot was MVI_0215.mov. I copied this to my portable drive. I then started the long process of creating a short animation with this clip.
Task 1 - Cut Out the Cat
It is recommended that when camera matching you have to remove any moving objects. I imported "MVI_0215.mov" and using After Effects CS4 masked out the cat any created a Targa Image Seqence "215-Master_nocat_00274.tga"

Task 2 - Track the Environment
I used MatchMover 2011 to track the image sequence and generate the required point data for 3D Studio Max

This is when I first noticed that I had shot @ 50 fps I had twice the number of files to track. 304 in total.
When importing into 3D Studio Max you have to make sure your Z-axis is point the correct way and also the Y and X axis. It took a few attempted to get the axis in the correct direction. I was pleased with the results after I had finished this stage.
Task 3 - Composite Tests
I started off by experimenting with simple 3D shapes in my new 3D enviroment and placing them all over the paved area of my scene. I founded that I got best results when I aligned my 3D assett to a cluster of points on my scene as individual points seemed not to have a stable track.

I was not happy with putting to many objects in my scene and non-organic shapes seemed to make the CG elements less believable. I decided to not put any objects in the path of the cat as it would make the scene harder to mask out.
Task 4 - 3D Scan of Face
After a few experiments I got my friend Jim to take 26 pics of around my face with me sat against a wall. It as amazing how hard it its to sit still.

I took the pictures into a program called AgiSoft PhotoScan and generated a 3D mesh of my face from the 26 pics

I took the mesh into Zbrush and using the smooth tool mainly, tidied up the mesh to get rid of any lumps and bumps.
Task 5 - 3D Scan of Statue
 Again using AgiSoft PhotoScan and a set of pictures of a tidy statue I have got in my study I generated a mesh.
Statue 1 = Original Scan
Statue 2 = Smoothed Object after ZBrush
Statue 3/4 = Experiments with 3D Studio Max and cutting into the original mesh
Task 6 - 3D Studio Max
I took my head scan and statue scan and placed them in my environment. I applied a stone texture to the statue and a chrome/metallic finish to the heads. I followed the youtube video "http://www.youtube.com/watch?v=UCbrrlIZSe0&feature=related" to create realistic shadows. I used the original movie as a reflection to add realism.

Task 7 - After Effects
I composited the scene together
backgound = original footage
layer 1 = CG elements
layer 2 = copy of original footage and just a mask of the cat to solve the problem when the cat walks infront of layer1
I then created a master file 215-Master.mov (6 secs) 50fps
Task 8 - Premiere
I cut the 6 sec clip into 2 sections A = 4 sec B = 2 secs
I then repeated and reverse part A of the clip so it looked like the camera was panning back and forth. The final clip went Reverse A 100% speed,A 100% speed,Reverse A 80% speed,A 80% speed,Reverse A 100% speed,A 100% speed,B
Task 9 - After Effects 2
I took the last "Reverse A 100% speed,A 100% speed," 18:34 secs to 34:13 secs and apply a scale and position chnages to give the effect that the camera was zooming in on the head.
Finish
I added the sound track "On Wings of Song - Felix Mendelssohn Bartholdy" as I am getting married soon and it is one of the pieces that is getting played at the wedding.
Final Version = http://www.vimeo.com/22522115
I shot a simple 6 second clip of the my cat (Mowgli) who managed to sit still for about 5 seconds before running out of shot. The video file of this shot was MVI_0215.mov. I copied this to my portable drive. I then started the long process of creating a short animation with this clip.
Task 1 - Cut Out the Cat
It is recommended that when camera matching you have to remove any moving objects. I imported "MVI_0215.mov" and using After Effects CS4 masked out the cat any created a Targa Image Seqence "215-Master_nocat_00274.tga"

Task 2 - Track the Environment
I used MatchMover 2011 to track the image sequence and generate the required point data for 3D Studio Max

This is when I first noticed that I had shot @ 50 fps I had twice the number of files to track. 304 in total.
When importing into 3D Studio Max you have to make sure your Z-axis is point the correct way and also the Y and X axis. It took a few attempted to get the axis in the correct direction. I was pleased with the results after I had finished this stage.
Task 3 - Composite Tests
I started off by experimenting with simple 3D shapes in my new 3D enviroment and placing them all over the paved area of my scene. I founded that I got best results when I aligned my 3D assett to a cluster of points on my scene as individual points seemed not to have a stable track.

I was not happy with putting to many objects in my scene and non-organic shapes seemed to make the CG elements less believable. I decided to not put any objects in the path of the cat as it would make the scene harder to mask out.
Task 4 - 3D Scan of Face
After a few experiments I got my friend Jim to take 26 pics of around my face with me sat against a wall. It as amazing how hard it its to sit still.


I took the mesh into Zbrush and using the smooth tool mainly, tidied up the mesh to get rid of any lumps and bumps.
Task 5 - 3D Scan of Statue

Statue 1 = Original Scan
Statue 2 = Smoothed Object after ZBrush
Statue 3/4 = Experiments with 3D Studio Max and cutting into the original mesh
Task 6 - 3D Studio Max
I took my head scan and statue scan and placed them in my environment. I applied a stone texture to the statue and a chrome/metallic finish to the heads. I followed the youtube video "http://www.youtube.com/watch?v=UCbrrlIZSe0&feature=related" to create realistic shadows. I used the original movie as a reflection to add realism.

Task 7 - After Effects
I composited the scene together
backgound = original footage
layer 1 = CG elements
layer 2 = copy of original footage and just a mask of the cat to solve the problem when the cat walks infront of layer1
I then created a master file 215-Master.mov (6 secs) 50fps
Task 8 - Premiere
I cut the 6 sec clip into 2 sections A = 4 sec B = 2 secs
I then repeated and reverse part A of the clip so it looked like the camera was panning back and forth. The final clip went Reverse A 100% speed,A 100% speed,Reverse A 80% speed,A 80% speed,Reverse A 100% speed,A 100% speed,B
Task 9 - After Effects 2
I took the last "Reverse A 100% speed,A 100% speed," 18:34 secs to 34:13 secs and apply a scale and position chnages to give the effect that the camera was zooming in on the head.
Finish
I added the sound track "On Wings of Song - Felix Mendelssohn Bartholdy" as I am getting married soon and it is one of the pieces that is getting played at the wedding.
Final Version = http://www.vimeo.com/22522115
Friday, April 15, 2011
Match Mover Test 1
Finally after 1000 attempts I have crack Match Mover
http://vimeo.com/22435718
I am going to import my 3d scan data and sort out the shadows
I found the video below that will help with the shadows problems
http://www.youtube.com/watch?v=UCbrrlIZSe0&feature=related
http://vimeo.com/22435718
I am going to import my 3d scan data and sort out the shadows
I found the video below that will help with the shadows problems
http://www.youtube.com/watch?v=UCbrrlIZSe0&feature=related
Monday, April 11, 2011
550D + PhotoScan + Max + ZBrush
I took a sequence of photos rotating around a small figurine. I then processed the pictures in PhotoScan and was really impressed with the results with the inside of the figurine.
1. Tidy up in 3D Studio Max 2011 to remove rouge scan data
2. Take it into Zbrush 4.0 and using move and smooth tool only tidy it up a bit
3. Back into 3D Studio Max 2011 and used ProCutter Tool to cut some shapes in it

1. Tidy up in 3D Studio Max 2011 to remove rouge scan data
2. Take it into Zbrush 4.0 and using move and smooth tool only tidy it up a bit
3. Back into 3D Studio Max 2011 and used ProCutter Tool to cut some shapes in it

Saturday, April 9, 2011
Robot Arm Project
I finally got around to filming the footage a wanted to for my assigment usign the robot arm.
I am need a speand a couple of daying aligning footage and tweaking the green screen to get the effect I want.
I am need a speand a couple of daying aligning footage and tweaking the green screen to get the effect I want.
New Toy - Just bought myself a Canon 550D
I am usually a skin flint when it come to spending money and I though I would invite in the decent digital camera that have video capablity. It does 1080 and 720 at 60 fps. I am going to spend the majority of today playing with "PhotoScan" to get some good scans.
Wednesday, April 6, 2011


Tuesday, April 5, 2011
Monday, April 4, 2011
3D Scan - Attempt 2

Scan within AgiSoft PhotoScan

Exported from AgiSoft PhotoScan and imported into 3D Studio MAX and texture added

3D Scan - Attempt 1
After reading http://www.ten24.info/index.php/3d-scanning-on-a-budget/ from www.cgarena.com I wanted to have a play with this software to see if it could create the data I wanted.
1. Picture of me

I used a sequence of pics and imported them into "AgiSoft PhotoScan" and came out with the following results :-

1. Picture of me

I used a sequence of pics and imported them into "AgiSoft PhotoScan" and came out with the following results :-

I need to take a better set of pictures for get better results
Monday, March 21, 2011
A1E attached to Robot Arm
With the help of colleague Richard I attached a Sony A1E to a robot arm and moved the camera around a fixed point. I forgot to take a tape down but it looked really good in the flip out screen.


Enjoy
David
I plan to create a short clip of footage with 5 versions of me in it
Friday, March 11, 2011
Assignment - Work In Progress
Just a test in After Effects for my assignment
Assignement Idea
Produce a gallery of different parts of my work

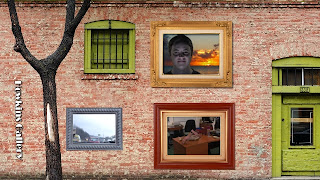
Produce a gallery of different parts of my work


Tuesday, March 1, 2011
Wednesday, February 23, 2011
Car Trip v2
This is a film of my journey to work
This clip is from the M1

Used a Sony A1E with the tripod strapped to the passenger seat.
I had to correct the footage by 5 degrees as the footage was tilted
A1E is a nice little camera but I think I prefer the Z1
Tuesday, February 22, 2011
Friday, February 18, 2011
Wrist Project - 18th Feb 2010
After setting up a D50 in the office I took two stills :-
1 : blank plate
2: wrist in shot with green screen cloth wrapped around forearm
I them used the mock up of the wrist I did in 3D Studio Max and composted it in

1 : blank plate
2: wrist in shot with green screen cloth wrapped around forearm
I them used the mock up of the wrist I did in 3D Studio Max and composted it in
Green Scene Pratice - With Ken - 17th Feb 2010
Session with Ken
Pratice session in the performance studio - Filmed "D" using nun-chucks and part of my hand for my project
Pratice session in the performance studio - Filmed "D" using nun-chucks and part of my hand for my project
Thursday, February 17, 2011
Green Scene Pratice - Journey to Car - Feb 2010
For the last 2 1/2 years I have been travelling from Hoyland to Sheffield to work and wanted to document the journey. I strapped on a Sony Z1 camera on to the parcel shelf of my car (Seat Leon) I used a cushion and bungee cords to secure it down.


Sample Output


Sample Output
Green Scene Pratice - Arm (Cross Section) - Feb 2010

Green Scene Pratice - Arm - Feb 2010
Part of my project I am looking at removing sections of body parts in screen
 I took two photos on a tripod :-
Photo 1 = Blank Wall


Photo 1 = Blank Wall

Green Scene Pratice - PhotoShop - Oct 2010
I set up a tripod on my front room to have a go a green screen within photoshop


Subscribe to:
Posts (Atom)